PeopleSoft Human
Resources Workforce Administration provides the foundation for your human
resource management system. The data entered into the Workforce Administration
business process is available to all of the PeopleSoft Human Resources business
processes as well as the other applications in the PeopleSoft HRMS suite.
The PeopleSoft Human
Resources Workforce Administration business process includes five basic steps:
1. Setting up the basic
codes and formats needed for the business process. Some of these include
setting up the Location Table, Job Code in Position Management, Department
Table, and the Department Tree.
2. Adding a person’s
human resources record into the system. This includes personal data such as
name, address, and employment eligibility; job data such as supervisor,
department, and salary; and employment data such as tenure with your
organization.
3. Entering additional data into the record.
This includes information such as prior work experience, emergency contact
information, drivers license information, and volunteer activities.
4. Updating the record.
5. Viewing and reporting on employee data.
Upon completion of this
module, you will be able to:
• Add a person.
• Increase the
workforce.
• Enter additional data in HR records.
• Manage grievances and
disciplinary actions.
• Update person and job
information.
• Manage compensation.
• View summary
workforce information.
Adding a Person
To create a person record, use the Add a Person page. This lesson provides an overview of
identification assignment, lists common elements, and discusses how to:
• Enter name and biographical data.
• Enter contract information.
• Enter country-specific person data.
• Create organizational relationships and maintain checklists.
Note: You should create and save either a Job Data or a Person of Interest (POI) Relationship
record for a new person at the time you create the new person.
Prior to adding a person into the system, you should perform a Search for Matching Persons.
This is to ensure data integrity by preventing duplicate persons from being created in the system.
This is important because we are now adding some persons (POI & CWR) without Social
Security Numbers.
Upon completion of this lesson, you will be able to:
• Add Employees
• Add a Persons of Interest (POI)
• Contingent Workers
establish the "Person" relationship with the University, they also need to be hired into a position.
This process will take all of the job and position attributes created in the Job Code Table and
Manage Positions and apply them to the employee's job data.
To print a copy of the picture shown below click on the following link: Hiring Steps
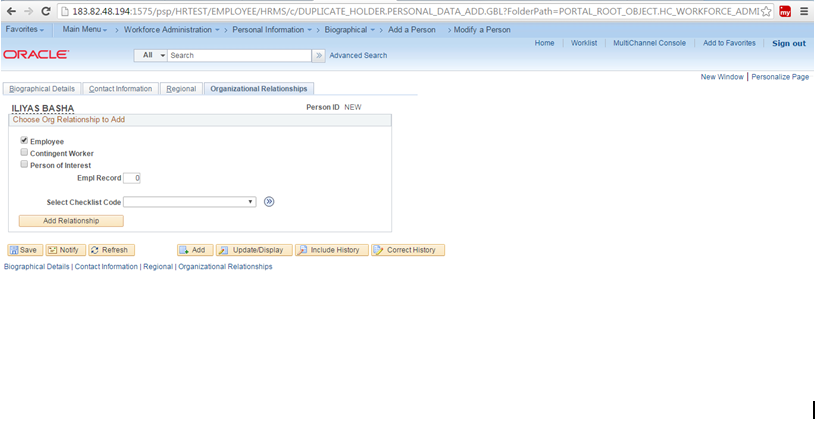
Navigation: Main -> Workforce Administration
-> Personal Information -> Biographical -> Add a Person
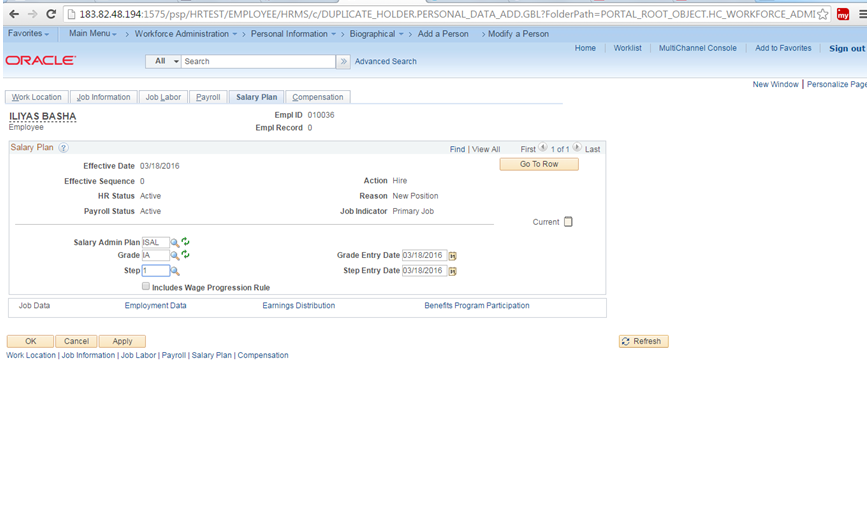
After completion of Compensation details click on save Button .Then the person will added successfully.
Adding a Person
To create a person record, use the Add a Person page. This lesson provides an overview of
identification assignment, lists common elements, and discusses how to:
• Enter name and biographical data.
• Enter contract information.
• Enter country-specific person data.
• Create organizational relationships and maintain checklists.
Note: You should create and save either a Job Data or a Person of Interest (POI) Relationship
record for a new person at the time you create the new person.
Prior to adding a person into the system, you should perform a Search for Matching Persons.
This is to ensure data integrity by preventing duplicate persons from being created in the system.
This is important because we are now adding some persons (POI & CWR) without Social
Security Numbers.
Upon completion of this lesson, you will be able to:
• Add Employees
• Add a Persons of Interest (POI)
• Contingent Workers
Adding an Employee into a Position
Adding an employee to HR Direct not only requires that we capture their biographical data andestablish the "Person" relationship with the University, they also need to be hired into a position.
This process will take all of the job and position attributes created in the Job Code Table and
Manage Positions and apply them to the employee's job data.
To print a copy of the picture shown below click on the following link: Hiring Steps
After completion of Compensation details click on save Button .Then the person will added successfully.


No comments:
Post a Comment